Are you ready to combine fashion with function in your crochet projects? Crafting your own crochet boots is a delightful way to showcase your skills while creating something practical and stylish. Whether you’re looking to make cozy slippers for lounging at home, chic boots for everyday wear, or a thoughtful handmade gift, this step-by-step tutorial is perfect for you.
Crochet boots offer endless customization possibilities. You can choose the color, texture, and embellishments to suit your taste or match a specific outfit. Plus, making your own boots ensures they fit perfectly and reflect your unique style. Even if you’re a beginner, don’t worry—this guide will walk you through every detail, from starting the sole to adding decorative touches.
Ready to create a pair of boots you’ll love to wear? Gather your materials, grab your crochet hook, and let’s get started!
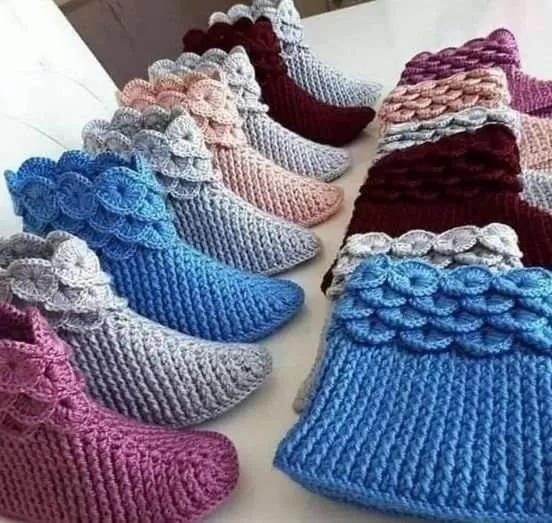
RequiredMaterials: Yarn: Ören Bayan Dora (Color: 066) Hook: Size 5 (0.5mm)
Boot Making Instructions
Prepare the Sole: You can use a pre-prepared sole. Chain two and start creating double crochet stitches. Wrap each double crochet around the post (post stitches). No increases or decreases are needed.
First Row: In the first row, create post stitches for all double crochet stitches. At the end of the row, make 2 chains in the spot where you worked without wrapping the yarn over. Complete the row.
Second Row: Work front post and back post double crochet stitches alternately. Alternate between front post double crochet (FPDC) and back post double crochet (BPDC). The ideal count is approximately 110 stitches.
Third and Fourth Rows: Continue with the same alternation of FPDC and BPDC stitches. In the fourth row, begin decreasing in the toe area: When you reach the toe, join 3 double crochets to form one stitch: Take the back post double crochet stitches in order and gather them into a single stitch.
Toe Decreasing Process: Continue decreasing in the toe area. In each row, combine 3 stitches in the toe area to decrease. For the side stitches, continue with FPDC and BPDC alternately, without any increases or decreases.
Row Continuation: Perform the decreases only in the toe area. There are no increases or decreases in other parts. Repeat this process until the 7th row.
Row End and Upper Transition: At the end of each row, chain to transition to the next row. For the upper part of the boot, continue with the same FPDC and BPDC stitches until reaching the desired length.
Toe Shaping: In each row, continue matching 3 stitches in the toe area. Once the toe area is complete, continue working the sides with regular double crochet stitches.
Finishing Touches: Align the heel area neatly to complete the boot. Optionally, add decorative elements like a crocodile stitch motif or other embellishments to the upper part.
Notes: If this is your first time, be patient. The pattern might seem challenging, but following the steps carefully will help you succeed. Check your yarn supply; nearly a full skein might be required for one boot.
Video Tutorial:
Congratulations! You’ve completed your very own pair of crochet boots. From crafting the sturdy sole to adding those final decorative touches, you’ve turned a bundle of yarn into a stylish and practical creation. Not only do these boots showcase your crochet skills, but they also add a unique and personal flair to your wardrobe.

