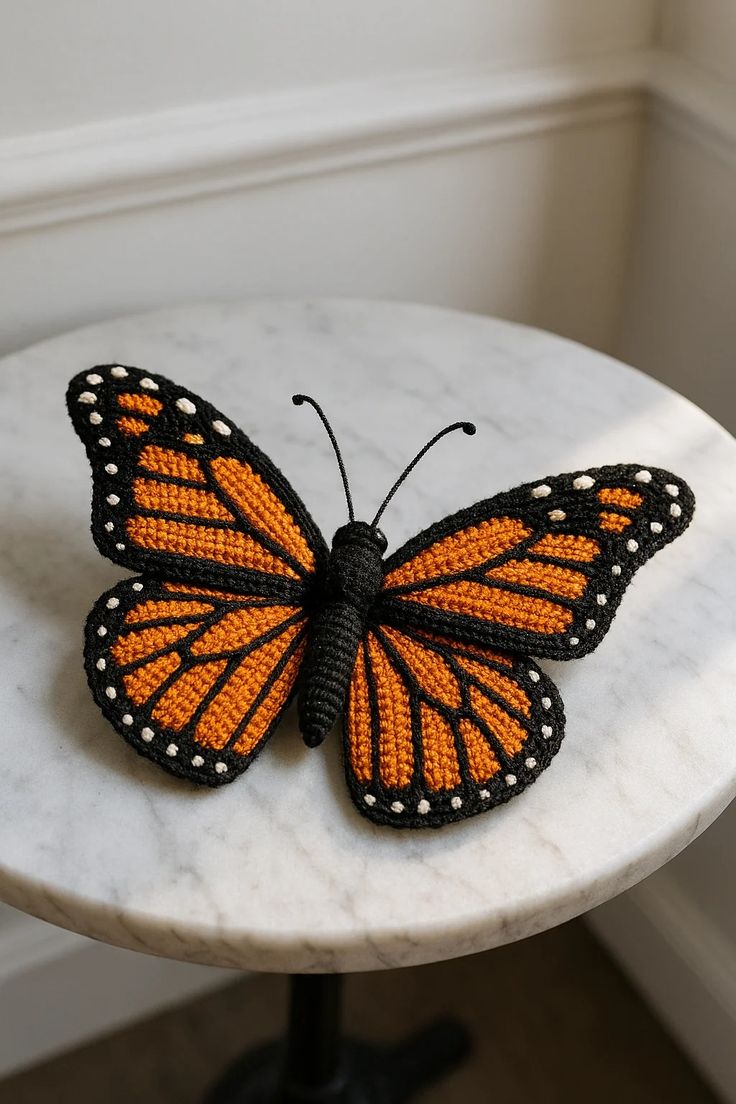
If you love creating soft, charming crochet creatures, this Butterfly Amigurumi Pattern will quickly become one of your favorite projects! Perfect for spring decorations, nursery gifts, or simply as a cheerful desk companion, this little butterfly combines bright colors, soft texture, and pure cuteness in every stitch.
Amigurumi, the Japanese art of crocheting small stuffed toys, allows crafters to express creativity through color and texture. This butterfly pattern is beginner-friendly and works up quickly, making it a great project for using leftover yarn or experimenting with new color palettes.
Crocheting a butterfly amigurumi is a joyful and relaxing experience it’s small enough for quick crafting, yet detailed enough to feel truly special. Whether you’re making just one or a whole collection, each butterfly will bring color and happiness wherever it lands.
🧶 Materials
-
Orange cotton thread
-
Black cotton thread
-
Crochet hook size 1.5 mm
-
Stitch markers
-
Tapestry needle
-
Sewing needle
-
Black sewing thread
-
Acrylic paint (orange, red, yellow, white, black)
-
Galvanized wire No. 18
-
Galvanized wire No. 20
-
Thin wire (small amount – for antennae)
-
Paintbrush
-
Scissors
-
Pliers
-
Masking tape
-
Glue
🪡 The yarn used in the original project is “Tetejo” brand cotton thread — a thin strand yarn.
📏 The included printed template should be printed on Letter/A4 at actual size. The finished butterfly measures approximately 15.5 x 10.5 cm.
🔠 Abbreviations (US Terms)
| Abbreviation | Meaning |
|---|---|
| Sc | Single crochet |
| Inc | Increase |
| Dec | Decrease |
| Ch | Chain |
| Sl st | Slip stitch |
| MR | Magic ring |
🧰 Structure
The butterfly wings are divided into four sections:
2 upper wings and 2 lower wings.
You will begin by forming a wire base using galvanized wire No.18 (the thickest wire). Use the printed template to shape the outline of each wing. Leave a few extra centimeters of wire to trim later.
You can secure the wire shape with masking tape for stability.
Then, crochet directly over this wire base — from the outside to the inside of each piece.
🪽 Upper Wing (Make 2)
Rnd 1: 60 Sc around the wire base. (60)
Rnd 2: Sc, place marker, Sc, Dec, (2 Sc, Dec) × 14 (45)
Rnd 3: (Sc, Dec) × 15 (30)
Rnd 4: Sc, Dec, 9 Sc, 3 Dec, 10 Sc, Dec (25)
Rnd 5: 2 Dec, 6 Sc, 3 Dec, 9 Sc (20)
Rnd 6: 2 Dec, 2 Sc, 4 Dec, 4 Sc, Dec (13)
Rnd 7: 6 Dec, Sc (7)
Fasten off both ends, weave in the tails neatly and flatten the piece.
To stiffen the wings, apply a thin layer of glue on both sides and let dry completely.
Repeat once more for the second upper wing.
🪽 Lower Wing (Make 2)
Rnd 1: 48 Sc around the wire base. (48)
Rnd 2: Sc, place marker, Sc, Dec, (2 Sc, Dec) × 11 (36)
Rnd 3: (Sc, Dec) × 12 (24)
Rnd 4: 2 Dec, 5 Sc, Dec, 4 Sc, Dec, 5 Sc, Dec (19)
Rnd 5: Dec, 5 Sc, Dec, Sc, Dec, Sc, Dec, 2 Sc, Dec (14)
Rnd 6: 7 Dec (7)
Fasten off, weave in ends, and apply a layer of glue on both sides to stiffen. Let dry.
Repeat once more for the second lower wing.
🎨 Painting the Wings
You can use the printed template or follow the sequence below.
Use acrylic paints and a small brush.
✨ Upper Wing
-
Paint the edges with black acrylic paint.
-
Add orange paint to the upper areas.
-
Use yellow for the base of the wing.
-
Mix orange with a touch of red for gradient effects.
-
Finish by adding white spots along the edge.
-
Once dry, turn the piece over and repeat on the back.
✨ Lower Wing
-
Paint the edges black and create separations like in the pictures.
-
Apply yellow at the base of the wing.
-
Use orange mixed with red toward the edges.
-
Add white spots along the edge.
-
Once dry, paint the other side as well.
🪶 Assembly of Wings
When all four wings are dry and firm, sew the upper and lower parts together using black sewing thread.
Remove any masking tape and secure the joins firmly.
Repeat for the second pair of wings.
🐛 Body
Use black cotton thread.
Rnd 1: 6 Sc in MR (6)
Rnd 2: 6 Sc
Rnd 3: (Sc, Dec) × 2 (4)
Rnd 4: 4 Inc (8)
Rnd 5–7: 8 Sc
(No stuffing required.)
Rnd 8: 6 Sc, Dec (7)
Rnd 9: 7 Sc
Rnd 10: Sc, Dec, 4 Sc (6)
Rnd 11: 4 Sc, Dec (5)
Rnd 12: 3 Sc, Dec (4)
Rnd 13: 2 Sc, Dec (3)
Fasten off.
🧵 Assembly
Insert the first pair of wings through the body using the wire ends.
Sew them to the body with black thread, and cut any wire excess with pliers.
Repeat with the second pair of wings.
🦋 Legs and Antennae
-
Cut 3 pieces of No.20 wire, each about 6–8 cm long.
Pass them through the body to form 6 legs. -
For the antennae, use the thinnest wire available, bending the tips slightly.
-
Paint both legs and antennae with black acrylic paint.
Once dry, apply glue (one or more coats if needed) to secure them firmly.
Leave the butterfly to dry upside down.
🌟 And that’s it!
You now have your own Monarch Butterfly Amigurumi!
Beautiful, delicate, and perfect for decoration or as a handmade gift. 💛🖤🧡