Are you ready to create a cozy and stylish winter hat perfect for chilly days? This Winter Crochet Hat Pattern is designed with simplicity and elegance in mind, making it ideal for both beginners and seasoned crocheters.
Using the charming cluster stitch, this pattern creates a textured and snug design that’s perfect for children and adults alike. Whether you’re crafting a hat for your little one or creating a thoughtful handmade gift, this step-by-step guide will walk you through every detail.
With easy-to-follow instructions, tips for size adjustments, and the opportunity to personalize the final look, this hat is a fun and rewarding project to add to your crochet repertoire. Pair it with your favorite yarn and a 3.5 mm hook, and let’s make something warm and beautiful together!
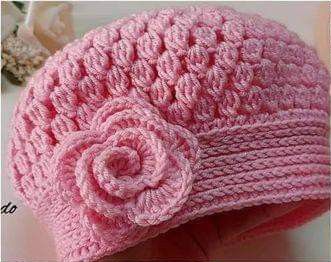
Materials Needed Yarn: Himalaya Baby Luxe (100 grams, 250 meters) or a similar soft yarn suitable for hats. Hook: 3.5mm crochet hook. Additional: Stitch marker (optional), scissors, yarn needle for weaving in ends.
Key Terms & Abbreviations Magic Circle: A loop used as the foundation for circular crochet patterns. Ch: Chain stitch. YO: Yarn over. Sl St: Slip stitch. Cluster Stitch: A group of three incomplete double crochet stitches worked together in the same space. Inc: Increase (two cluster stitches in the same space).
Step-by-Step Instructions
Step 1: Foundation Start with a Magic Circle: Wrap the yarn around your fingers to create a loop. Insert the hook into the loop, YO, and pull through. Chain 2 (counts as the starting point for the cluster stitches).
Forming the First Cluster Stitch: YO, insert the hook into the magic circle, pull up a loop (3 loops on the hook). YO, pull through the first 2 loops on the hook (2 loops remain). Repeat this step two more times in the same space. You will have 3 incomplete double crochet stitches and 4 loops on the hook. YO and pull through all 4 loops to complete the cluster stitch. Chain 2.
Complete Round 1: Repeat the cluster stitch + chain 2 five more times (6 cluster stitches total). Tighten the magic circle by pulling the tail of the yarn. Join the round with a Sl St into the top of the first cluster stitch.
Step 2: Building the Hat with Increases
Round 2: Chain 2 (counts as the starting chain). In the first chain space, work: One cluster stitch, chain 2, and another cluster stitch (increase). Repeat in each chain space around. At the end of this round, you will have 12 cluster stitches. Join with a Sl St to the first cluster.
Round 3: Chain 2. In the first chain space, work: One cluster stitch, chain 2, and another cluster stitch (increase). In the next chain space, work: One cluster stitch, chain 2 (no increase). Alternate between increasing and regular cluster stitches. At the end of this round, you will have 18 cluster stitches. Join with Sl St.
Round 4: Chain 2 In the first chain space, work: One cluster stitch, chain 2, and another cluster stitch (increase). In the next two chain spaces, work: One cluster stitch, chain 2 in each (no increase). Alternate between increasing and two regular cluster stitches. At the end of this round, you will have 24 cluster stitches. Join with Sl St.
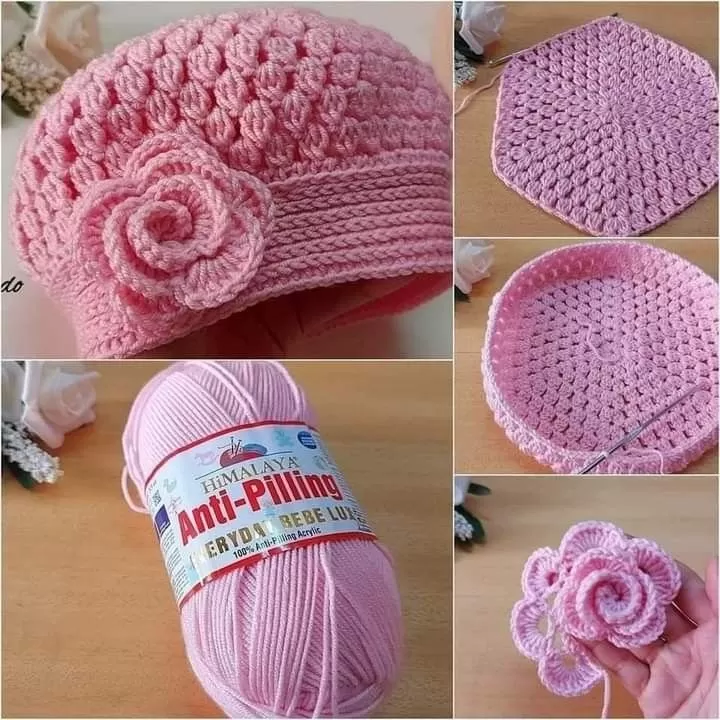
Round 5: Chain 2. In the first chain space, work: One cluster stitch, chain 2, and another cluster stitch (increase). In the next three chain spaces, work: One cluster stitch, chain 2 in each (no increase). Alternate between increasing and three regular cluster stitches. At the end of this round, you will have 30 cluster stitches. Join with Sl St.
Step 3: Adjusting the Size
Continue Adding Rounds: In each new round, add one more regular cluster stitch between increases. For example: Round 6: Increase, 4 regular cluster stitches. Round 7: Increase, 5 regular cluster stitches. Repeat this pattern until the circle’s diameter is the desired size.
Diameter Guidelines: For children: Measure the diameter of the head and add 5 cm. For adults: Measure the diameter of the head and add 7 cm.
Step 4: Shaping the Hat Once the desired circle size is achieved, stop increasing. Work even rounds (one cluster stitch in each space) until the hat reaches the desired height.
Final Touches
Rose Embellishment (Optional): Refer to the video linked in the description for a rose tutorial. Attach the rose to the hat using a yarn needle or by sewing.
Finishing: Weave in all loose ends with a yarn needle. Block the hat if needed to shape it nicely.
Video Tutorial:
Congratulations on completing your Winter Crochet Hat! This cozy and stylish hat is perfect for keeping warm during the colder months. With its simple cluster stitch design, you can easily customize the size for both children and adults. Whether you’re wearing it yourself or gifting it to someone special, this handmade creation is sure to be loved. Happy crocheting, and don’t forget to share your finished hats with friends and family!

