Crochet enthusiasts know that the magic lies not only in the finished project but also in the techniques that bring it to life. One such magical technique that has captured the hearts of crafters is the Magic Ring Crochet, also known as the magic circle or adjustable ring. This method revolutionizes the way we start crocheting in the round, providing a seamless and tightly closed center for various projects.
If you’re a crochet enthusiast, you’ve likely come across the magic ring technique. Also known as the magic circle or adjustable ring, this method is a game-changer when it comes to starting projects in the round. Perfect for creating seamless and tight centers, the magic ring is a must-have skill in any crocheter’s repertoire. In this tutorial, we’ll demystify the magic ring and guide you through the steps to master this enchanting technique.
The magic ring is a technique designed to eliminate the hole that can sometimes form in the center of crocheted circles. Traditionally, when starting a circular project, you might begin with a chain and then work your stitches into that chain. However, this can leave a noticeable gap in the center.
The magic ring, on the other hand, allows you to create a tightly closed center that virtually erases any visible hole, making it particularly popular for projects like amigurumi, doilies, and hats.
Step By step Tutorial:
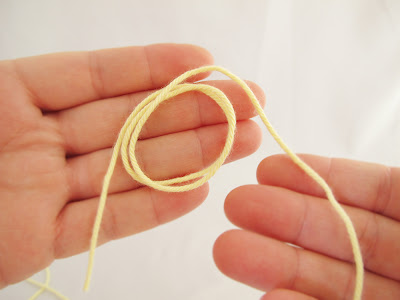
Step 1: Initiate the process by placing the tail yarn across your palm and securing it with your thumb. Wind the working end of the yarn around your palm twice, ensuring the winding direction is away from you. Carefully slip the two loops off your palm, ensuring that the working yarn is positioned on the right-hand side.
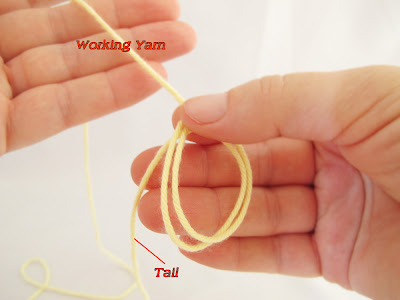
Step 2: Exercise caution as you pinch the top of the loop set between your forefinger and thumb of your right hand. Loop the working yarn around your left little finger, adopting your preferred yarn-holding method. Be meticulous not to undo the two loops of the circle.
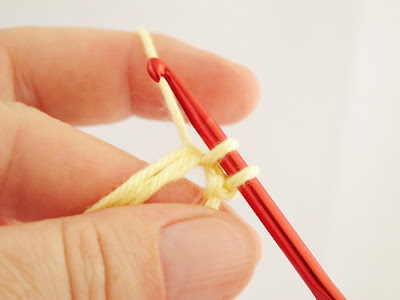
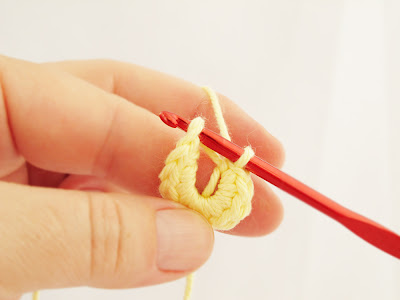
Step 3: Transfer the set of loops to your left hand, ensuring they remain connected. Insert your hook under the two loops circle, pull the working yarn through the circle, and bring it up in front of the loops. Your work should resemble the photo above. Next, perform a Yarn around Hook and pull it through the stitch on your hook, creating a chain stitch. Keep a tight hold of the loopy circle.

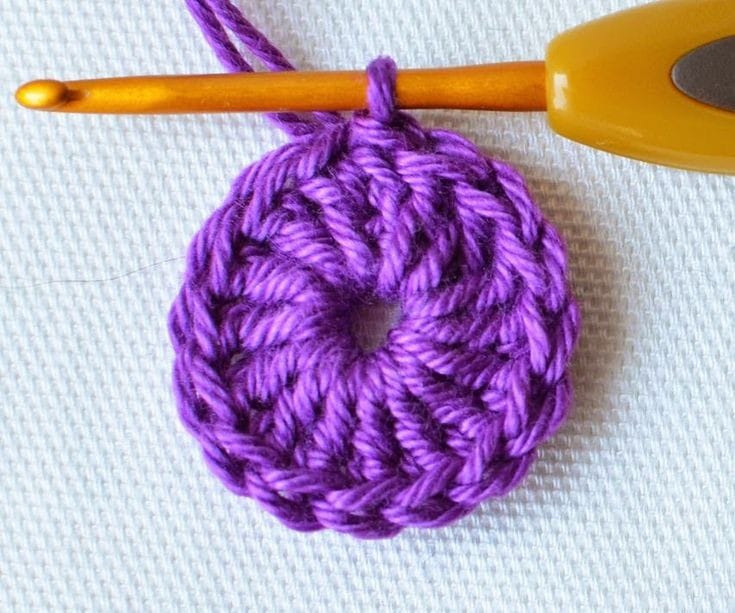
Step 4: Yarn around hook again, and pull through the stitch on your hook, successfully creating a single crochet stitch. Your work should resemble the photo above.
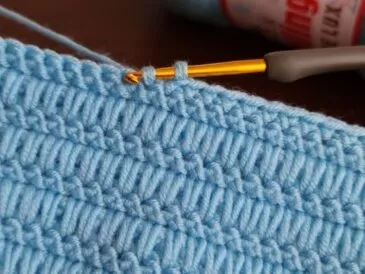
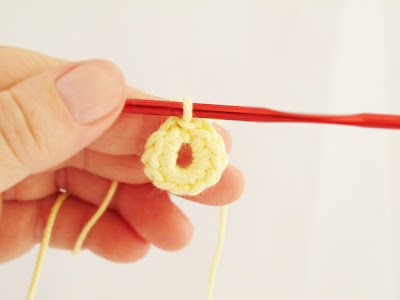
Step 5: Continue following this pattern, creating the required number of single crochet stitches as directed by your pattern. In the photos provided, 12 single crochet stitches were made for a new Hexagon pattern.

Step 6: With your required number of single crochet stitches completed, it’s time to close the ring. Gently pull on the Tail Yarn to identify which of the two loops is closest. Remember this loop.
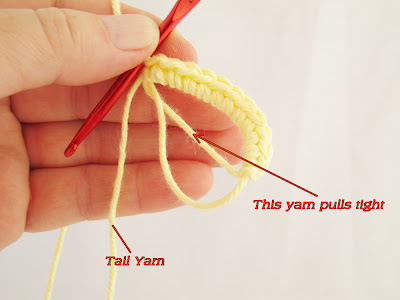
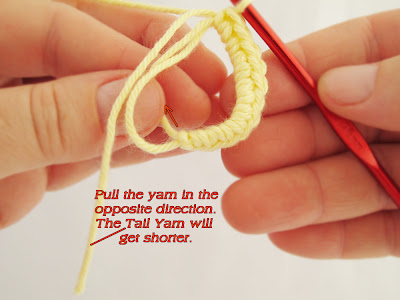
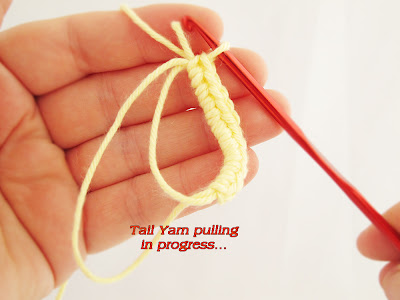
Step 7: Pull the shorter end of the yarn at the opposite end of where the Tail Yarn emerges, carefully pulling it in the opposite direction (indicated by the small red arrow). Continue pulling until the Tail Yarn is completely out of the Loopy Twosome, leaving you with just one loop yarn and a Tail.
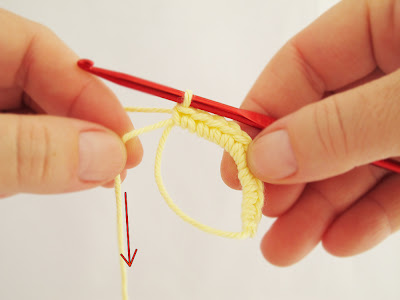
Step 8: Pull the Tail Yarn until you observe the circle loop becoming smaller, forming a nearly closed ring of single crochet stitches.
Step 9: Confirm that your crocheted ring is almost closed, with the first chain stitch lying next to the last single crochet made. All that remains is to join the circle in the round.
Step 10: Insert your hook into the initial chain stitch made at the beginning of the process. Perform a Yarn around Hook and make a slip stitch by pulling through both stitches on your hook. Celebrate as your ring is successfully closed! If there’s a large hole in the middle, pull hard on the Tail Yarn until it closes completely.
Step 11: With the ring closed, you’re now ready to embark on Round 2 of your crocheting adventure. Happy crafting!
The magic ring crochet technique is a captivating skill that elevates your projects to new levels of professionalism and aesthetics. As you weave the magic into your creations, you’ll find the center of your circles seamlessly disappearing, leaving behind a polished and enchanting finish. So, let the magic ring be your key to unlocking a world of endless possibilities in the realm of crochet!