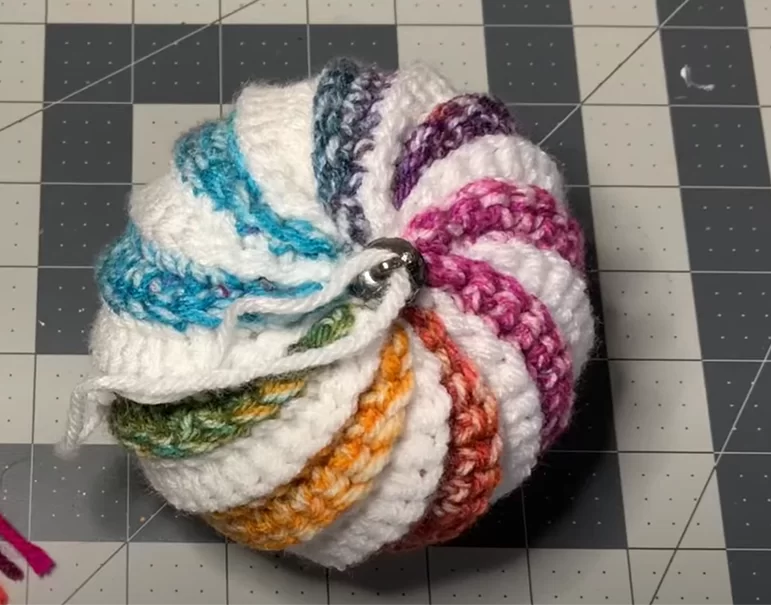
Step-by-Step Instructions
1. Start with a Slip Knot: Make a slip knot and chain 23.
2. First Row Begin in the second chain from the hook and make one single crochet in each chain across. You should have a total of 22 single crochets.
3. Change Color At the end of the row, change to your second color of yarn without cutting the first one. Pull in the new color and chain 1.
4. Back Loop Single Crochets Turn your work. Make one single crochet in the back loop only for each stitch across, maintaining 22 single crochets.
5. Swirling Effect – Decreasing Row Chain 1 and turn your work. Skip the first stitch and begin single crocheting in the back loop of the second stitch. Continue this pattern across. To maintain 22 stitches, add an extra single crochet at the end of the row. Use a stitch marker at the start of this row to mark it as a decreasing row.
6. Next Row (No Decrease) Chain 1 and turn your work. Make one single crochet in the back loop of each stitch, starting from the first stitch to keep the count at 22.
7. Alternate Rows – Decreasing and Regular Decrease Row: Skip the first stitch and crochet in the back loop of the second stitch (mark this row). Regular Row: Crochet in the back loop of each stitch without skipping, starting from the first stitch.
8. Color Changes Change colors every two rows by pulling up the new yarn without cutting. Alternate between your chosen Christmas colors to create a striped, festive look.
9. Continue the Pattern Work this alternating pattern of decreasing and regular rows until you reach the desired length for your ornament. The swirling effect is created by the decreasing rows, which shift the stitches slightly with each repetition.
10. Finishing Once you have completed the body of the ornament, fasten off, leaving a long tail for sewing. Use a darning needle to sew the edges together, forming a tube shape. Gather the top and bottom of the ornament by stitching tightly to close.
11. Decoration Add wooden beads to the bottom and top of the ornament as desired for extra decoration. You can also attach an ornament topper or make a yarn loop for hanging.
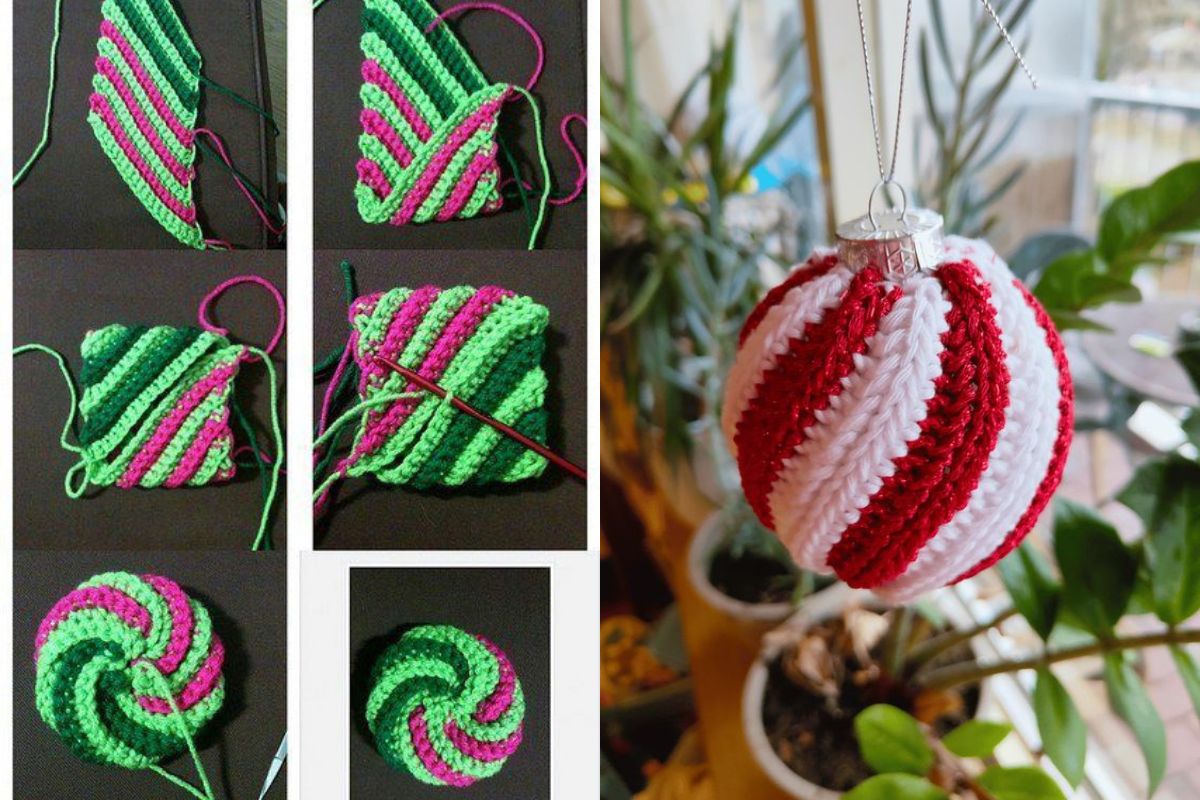
This simple yet elegant swirl ornament will be a fantastic addition to your Christmas tree or holiday decor. The swirling effect, combined with your chosen Christmas colors, creates a visually stunning piece that looks more complex than it actually is!
Enjoy making this fun and festive project, and happy crocheting!


1 Comment
[…] Easy Swirl Ornament Bauble Crochet Pattern […]