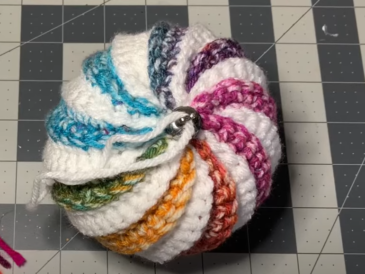
Crocheting is not just a craft; it’s an art form that allows for endless creativity and personalization. If you’re looking to take your crochet projects to the next level, the Crocheted Bobble Edging is a fantastic technique to add a touch of whimsy and charm. In this tutorial, we’ll explore the steps to create this delightful edging, perfect for elevating the aesthetics of your blankets, scarves, and more.
If you’re looking to add a touch of whimsy and texture to your crochet projects, the crocheted bobble edging is the perfect choice. This delightful and versatile edging adds a pop of personality to blankets, scarves, shawls, and more. In this tutorial, we’ll guide you through the simple steps to create a crocheted bobble edging that will elevate your handmade creations.
Select a yarn that complements your project. The weight of the yarn will determine the size of your bobbles, so choose accordingly. Pair it with an appropriate crochet hook for the chosen yarn weight. For a more delicate look, use a smaller hook, and for a bolder appearance, opt for a larger hook.
Materials Needed:
- Yarn in your desired color
- Crochet hook suitable for your yarn weight
- Scissors
- Yarn needle
Step By step:
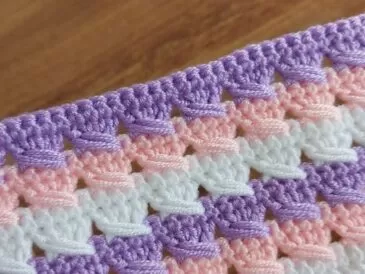
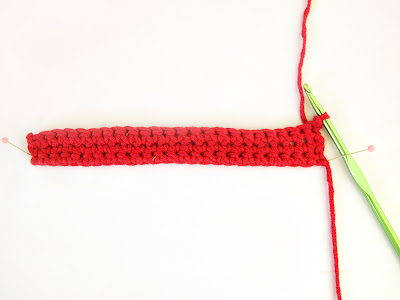
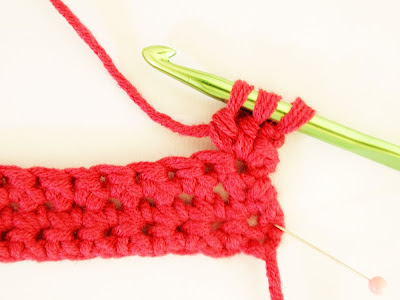
Step 1: Begin with a simple single crochet (sc) base, then turn your work and chain one.
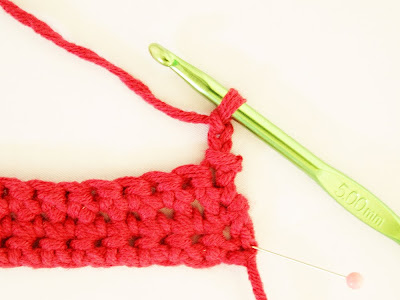
Step 2: Slip stitch into the FIRST space of the row. Remember, execute a Slip Stitch by inserting your hook into the space, yarn around the hook, pull through the space and the loop on the hook simultaneously. Chain 2.
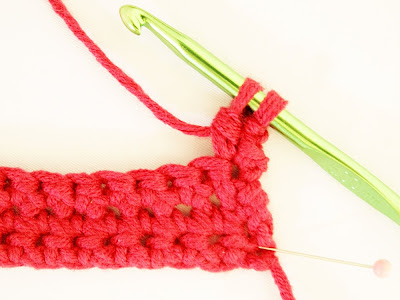
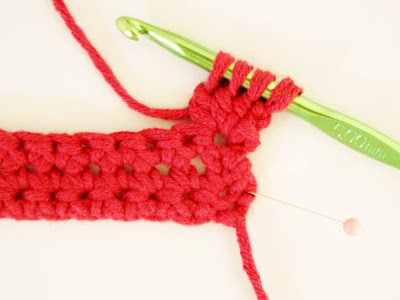
Step 3: Initiate a series of incomplete Double Crochet stitches. Yarn around the hook, insert it into the same space as the slip stitch, yarn around the hook, pull through, leaving three loops on your hook. Yarn around the hook, pull through TWO LOOPS, leaving two loops on your hook.
Step 4: Repeat the process: yarn around the hook, insert into the same space, yarn around the hook, pull through, resulting in four loops on your hook. Yarn around the hook, pull through TWO LOOPS, leaving three loops on your hook.
Step 5: Repeat the sequence once more, ensuring you now have FOUR LOOPS on your hook.
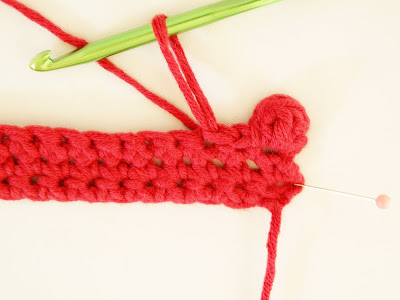
Step 6: Yarn around the hook and pull through ALL FOUR LOOPS, then Chain 1.
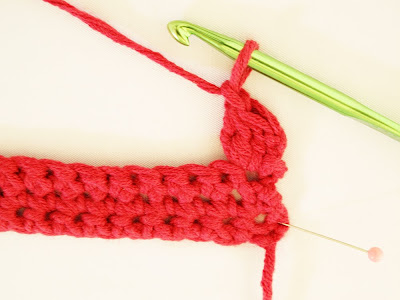
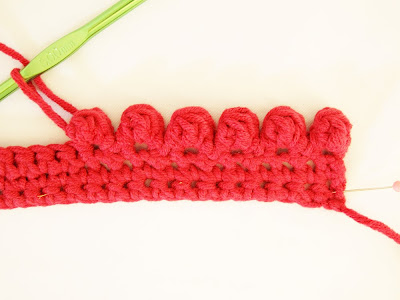
Step 7: Slip Stitch into the same space where you’ve been working, witnessing the formation of a charming bobble.
Step 8: Slip stitch into the next two stitches of your base work, providing a bit of space between the bobbles for a neat appearance.
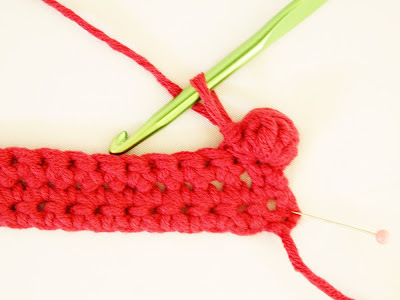
Step 9: Repeat the steps to create additional bobbles, following the pattern for a delightful result.

If your bobble doesn’t achieve the desired fullness, use your little finger to gently “pop” out the stitches forming the bobble from the back of your work, creating a small hollow space at the rear of the bobble.
Enjoy the process of crafting this charming crochet pattern!
With this crocheted bobble edging tutorial, you can easily enhance the beauty of your handmade creations. Experiment with different yarn colors and sizes to create unique and personalized designs. Whether you’re a seasoned crocheter or a beginner, this edging technique is a fun and rewarding way to add a touch of flair to your projects. Happy crafting!