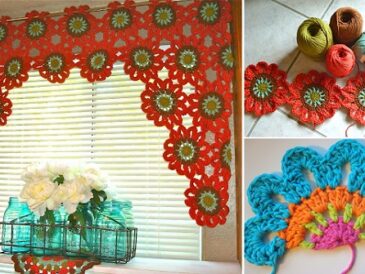
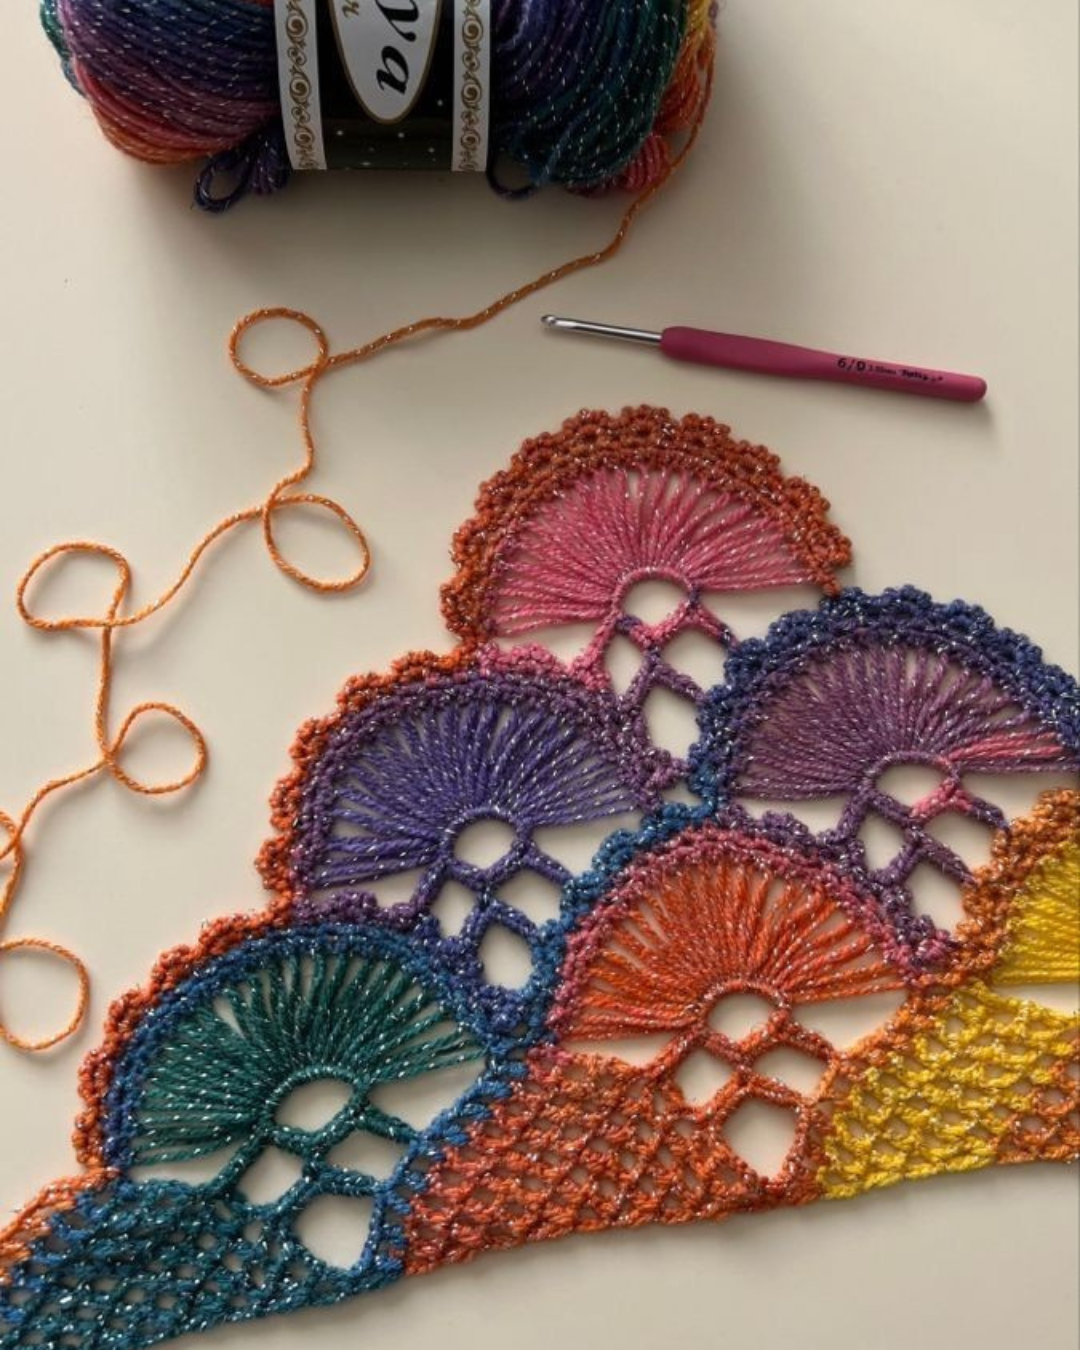
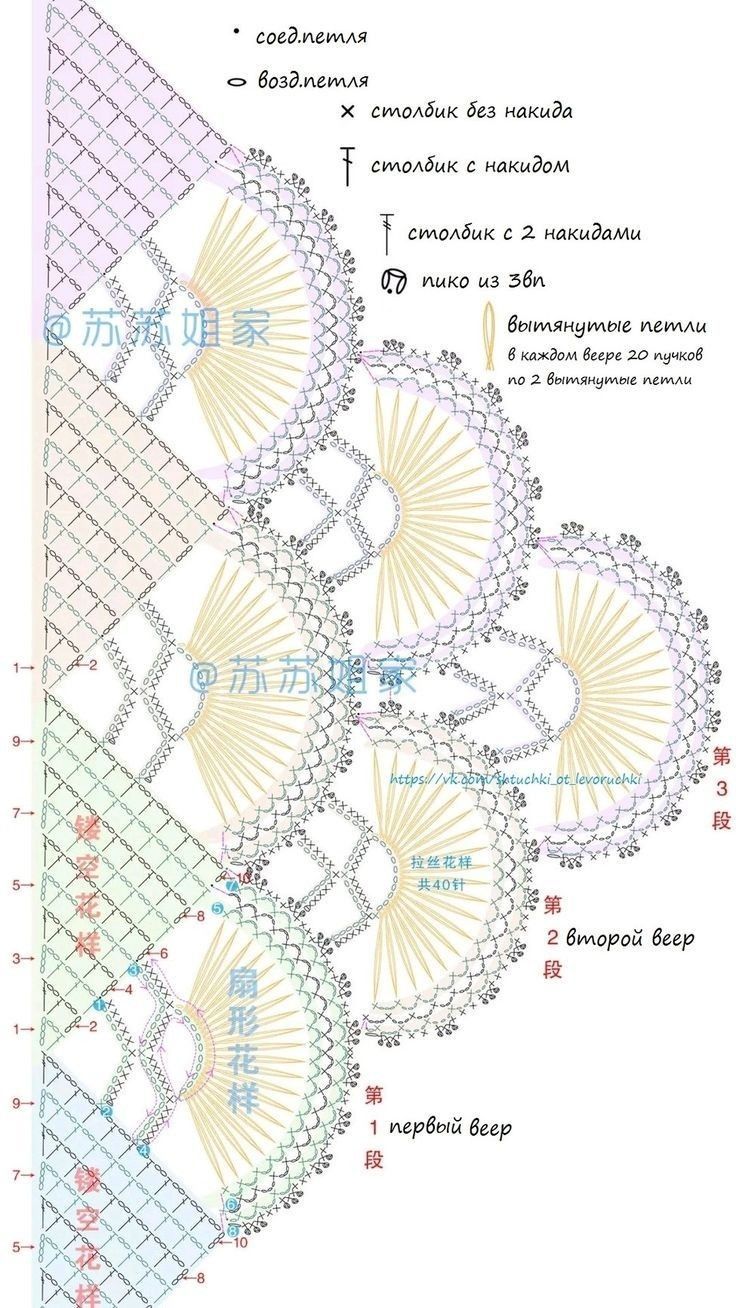
This elegant Crochet Fan Lace Border is perfect for adding a delicate and decorative finish to blankets, shawls, table runners, or even garments. The design features graceful fans created with extended stitches and picots, giving a light and lacy texture that beautifully drapes on any edge.
The pattern may look intricate, but it’s built from simple, repetitive stitches once you’ve mastered the first fan, the rest flows naturally. Let’s bring this elegant lace to life!
🧶 Materials
-
Cotton crochet thread or fine-weight yarn
-
1.75 mm or 2 mm crochet hook (depending on yarn thickness)
-
Scissors
-
Tapestry needle
📏 Gauge: Not critical
📐 Finished Width: Approx. 3.5–4 inches (9–10 cm), adjustable
🪡 Abbreviations (US Terms)
-
ch = chain
-
sl st = slip stitch
-
sc = single crochet
-
dc = double crochet
-
tr = treble crochet
-
dtr = double treble crochet (stitch with 2 yarn overs)
-
picot = ch 3, sl st into 3rd ch from hook
-
st(s) = stitch(es)
-
sk = skip
-
RS = right side
🌸 Notes
-
Each “fan” is made with elongated (extended) stitches — the diagram shows 20 long loops, representing 20 extended dc or tr stitches.
-
You can make as many fans as needed to reach your desired length.
-
Work all rows on the right side unless otherwise noted.
🧵 Pattern Instructions
Foundation (Base Mesh)
-
Ch a multiple of 10 + 1 (to fit the project edge).
-
Row 1: Dc in the 6th ch from hook, ch 2, sk 2 ch, dc in next ch, repeat across. Turn.
-
Row 2: Ch 5, dc in next dc (forms mesh pattern), ch 2, dc in next dc, repeat across. Turn.
-
Repeat for about 8–10 rows to create the base mesh before starting the first fan.
First Fan (1st Segment)
-
Attach yarn at the left corner of the mesh.
-
Ch 3 (counts as dc), make 40 long loops (extended tr stitches) in the same base (these are represented by the large yellow fan lines in the chart).
-
Join with sl st at the top of the fan to secure.
-
Work sc evenly across the base edge of the fan.
Fan Edge Decoration
-
Ch 1, work sc, ch 3 (picot), sc in next st around the curved edge of the fan.
-
Continue until the entire fan edge is trimmed with picots.
-
Sl st to base to secure.
Second Fan (2nd Segment)
-
Skip a few mesh spaces from the first fan (as shown in the diagram, about 8–10 squares).
-
Attach yarn in the next desired mesh section.
-
Repeat steps from First Fan, creating another 40 extended tr stitches in the same fashion.
-
Decorate the outer curve with picot edging (ch 3, sc) as before.
Third Fan and Following
-
Continue in pattern, creating each fan the same way.
-
Make sure each fan overlaps slightly with the previous one for a continuous scalloped edge.
-
The top edges of the fans are connected by a line of chain spaces and sc to unify the border.
Final Row (Top Connection)
After completing your last fan:
-
Work ch 3, sc into top of next fan across to connect all sections.
-
Fasten off and weave in all ends neatly.
💡 Tips
-
For a softer drape, use a thinner hook or bamboo yarn.
-
For a more defined lace, block your finished piece with steam or light pinning.
-
This border looks stunning on table runners, pillow edges, or shawls.
This Crochet Fan Lace Border adds a touch of sophistication to any handmade project. Its combination of airy loops, decorative picots, and structured fans makes it a timeless choice for elegant crochet finishing. Once you make the first motif, the rhythm of the pattern becomes wonderfully relaxing and meditative.