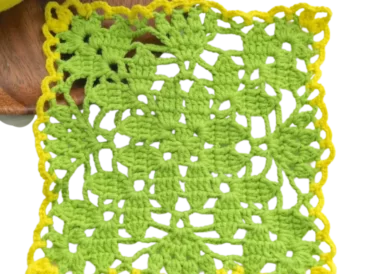
Crochet coasters are practical and stylish, and when adorned with beautiful butterfly designs, they become a charming addition to any table setting. These delicate coasters are perfect for springtime gatherings, tea parties, or simply brightening up your everyday decor. In this article, I’ll guide you through creating crochet coasters with butterfly motifs and share tips for making them unique.
Crochet butterfly coasters combine functionality and artistry. They protect your furniture from heat and moisture while showcasing your crochet skills. These coasters also make thoughtful handmade gifts for friends and family.
Today, I will try to show you how to make a very beautiful crochet pattern. We will use mercerized yarn for this project. Now, let’s get started on the process. I’m using a 1.75mm crochet hook.

Starting with a Magic Ring: First, I create a magic ring. Insert the hook into the ring, pull up a loop, and chain one. Chain three more for the first double crochet (dc). Work 12 dc into the ring, counting the first chain as a dc. Once 12 dc are completed, pull the magic ring tight to close it.
Closing the Round: Slip stitch into the top of the starting chain. Chain three to begin the next round.
Increasing the Stitches: In the second round, we will double the number of stitches, increasing from 12 to 24. Work 2 dc into each stitch around. Slip stitch to join.
Recap of Increases for Subsequent Rounds: Round 1: 12 dc. Round 2: 24 dc (2 dc in each stitch). Round 3: 36 dc (1 dc in the first stitch, 2 dc in the next, repeat). Round 4: 48 dc (2 single dc, 1 increase, repeat). Round 5: 60 dc (3 single dc, 1 increase, repeat). Round 6: 72 dc (4 single dc, 1 increase, repeat). Round 7: 84 dc (5 single dc, 1 increase, repeat). Round 8: 96 dc (6 single dc, 1 increase, repeat).
Each round is completed by slip-stitching into the starting chain and chaining three to begin the next round.
Adding Colors:
After completing the base rounds, change to white yarn: Pull the yarn through the last stitch and chain one to secure it. Follow the pattern, carrying and hiding the yarn tails as you go. Continue to increase as described in the recap, changing yarn as desired.
Creating the Final Round: After completing the 8th round with 96 dc, fasten off the yarn by pulling through the last loop and weaving in the ends. Ensure the magic ring at the center is secure and does not unravel.
Making the Butterfly:
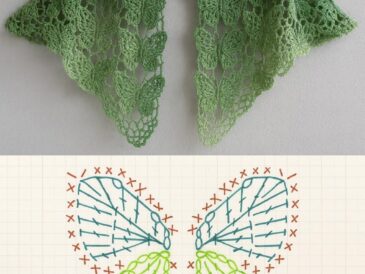
Start with a magic ring. Chain 7 and pull up loops into each chain stitch (7 loops in total). Pull up one additional loop from the magic ring for a total of 8 loops. Yarn over and pull through two loops at a time until only one loop remains. Insert the hook into the final loop and begin the next layer by pulling up loops from the back stitches. Reduce the number of loops in each round to shape the wings of the butterfly. After shaping, chain 4, secure the ends, and finish the butterfly.
Video Tutorial:
This pattern is perfect for a coaster, decorative piece, or an addition to your crochet projects. Enjoy crafting! 😊


