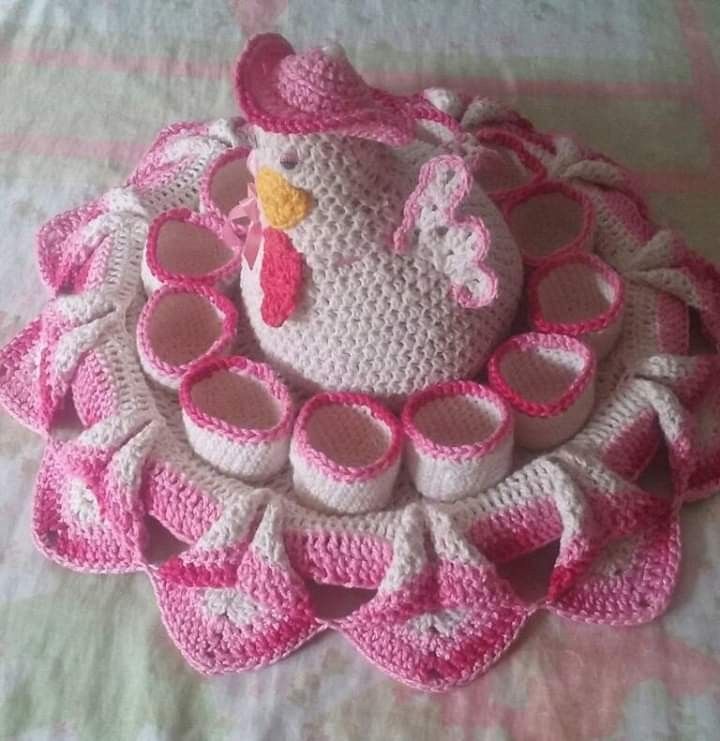
Looking for a creative way to store your Easter eggs, organize your kitchen space, or simply add a touch of handmade charm to your home décor? This adorable Crochet Chicken Egg Basket is both a practical and fun project, perfect for holding eggs or small items while adding a cute farmhouse vibe to your home.
Whether you’re preparing for the holiday season or looking for a unique, handmade gift idea, this project is a delightful choice for all skill levels.
Follow the step-by-step instructions below to crochet your own whimsical chicken egg basket. It’s easy to make, customizable, and sure to impress!
Materials Needed:
Yellow yarn (for the chicken body and beak) White yarn (for the top part of the basket) Red yarn (for the comb) Crochet hook (appropriate size for your yarn, typically 4.0mm to 5.5mm) Yarn needle (for weaving in ends) Scissors
Basket Base (Chicken Body)
Start with the body of the chicken, which will form the base of your basket.
Magic Circle & First Round: Using the yellow yarn, create a magic circle. Crochet 6 single crochets (sc) into the circle. Pull the yarn to close the circle and join with a slip stitch into the first sc to form a ring.
Round 1: Chain 1. Crochet 2 sc into each stitch around. Join with a slip stitch into the first sc. (12 stitches total)
Round 2: Chain 1. Crochet 1 sc into the next stitch, then 2 sc into the next stitch. Repeat this pattern around the ring. Join with a slip stitch into the first sc. (18 stitches)
Round 3: Chain 1. Crochet 1 sc into the next 2 stitches, then 2 sc into the next stitch. Repeat from * to * around. Join with a slip stitch into the first sc. (24 stitches)
Round 4: Chain 1. Crochet 1 sc into the next 3 stitches, then 2 sc into the next stitch. Repeat from * to * around. Join with a slip stitch into the first sc. (30 points)
Round 5: Chain 1. Crochet 1 sc into the next 4 stitches, then 2 sc into the next stitch. Repeat from * to * around. Join with a slip stitch into the first sc. (36 stitches)
Rounds 6-9: Chain 1. Crochet 1 sc in each stitch around. Join with a slip stitch into the first sc. (36 stitches)
Adding the White Section (Chicken’s Upper Body)
Round 10: Switch to white yarn. Chain 1. Crochet 1 sc in each stitch around. Join with a slip stitch into the first sc. (36 stitches)
Rounds 11-12: Chain 1. Crochet 1 sc in each stitch around. Join with a slip stitch into the first sc. (36 stitches)
Adding the Red Comb (Final Touch)
Round 13: Switch to the red yarn. Chain 1. Crochet 1 sc in each stitch around. Join with a slip stitch into the first sc. (36 stitches) Fasten off the yarn and hide the tails using the yarn needle.
How to Make the Beak:
With Yellow Yarn: Chain 6.
Row 1: Starting from the second chain from the hook, crochet 1 sc in the next 4 chains. Turn your work. (4 stitches)
Row 2: Chain 1. Crochet 1 sc in each stitch. Turn. (4 stitches)
Row 3: Chain 1. Crochet 1 sc in each stitch. Fasten off the yarn, leaving a long tail for sewing.
Assemble the Beak: Fold the beak in half and sew it to the front of the basket, just below the white part using the long tail.

You can customize this basket further by adding little eyes or wings using scrap yarn, buttons, or felt. This versatile and fun crochet chicken egg basket makes a perfect addition to your kitchen, a fun Easter gift, or a charming handmade décor piece. Enjoy creating this cute basket and show off your skills!
Happy Crocheting!