If you’re looking to add a unique and stylish touch to your home decor, 3D crochet coasters are the perfect project for you! These delightful, textured coasters can be customized to match any color scheme and are a practical yet creative way to protect your furniture from hot or cold beverages. In this article, we’ll guide you through the process of creating beautiful 3D crochet coasters with an easy-to-follow tutorial. Whether you’re a beginner or an experienced crocheter, you’ll enjoy making these fun and functional pieces!
Crochet coasters are a simple and affordable way to add handmade charm to your home. But what sets 3D crochet coasters apart is their added texture and depth. With a few extra crochet techniques, you can create coasters that pop off the table, adding visual interest and a tactile element to your home.
The beauty of 3D crochet is that the raised stitches and shapes give the coasters a sculptural look, making them a perfect gift for housewarmings, birthdays, or any special occasion. Plus, they’re a great way to practice your crochet skills and experiment with different stitch patterns.
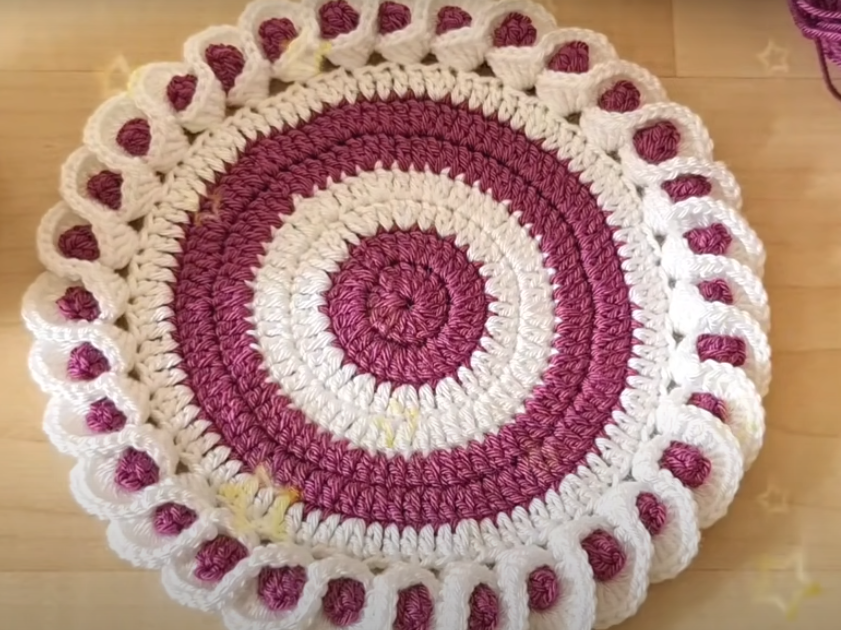
I’ll be showing you how to create a stunning crochet piece using mercerized yarn and a 1.75mm hook. Let’s get started with this fun and beautiful crochet project!
Materials Needed: Mercerized yarn (choose your preferred color) Crochet hook (1.75mm) Scissors Stitch markers (optional) Yarn needle for finishing
Step 1: Starting with a Magic Ring Begin by making a magic ring (also called a magic loop). Hold the yarn so that it forms a loop. Insert your hook into the loop, yarn over, and pull up a loop to form a working yarn. Chain 1 to secure the magic ring. Now you’re ready to begin crocheting into the ring.
Step 2: Creating the First Round Chain 3 to begin the first round, which will count as your first double crochet (DC). Yarn over and crochet 14 double crochets (DC) into the magic ring. Remember, each double crochet is created by yarn over, inserting the hook into the ring, pulling up a loop, and completing the double crochet.
Once you’ve made 14 double crochets, pull the tail of the magic ring to tighten it. Join with a slip stitch into the top of the first chain-3 from the beginning of the round to close the round.
Step 3: Increasing for the Second Round Chain 3 (this will count as your first double crochet for the next round). In this round, for each stitch, make 2 double crochets in each stitch around. This means you will crochet 2 DCs into each of the 14 stitches from the previous round. This will increase your total number of stitches to 28. Join with a slip stitch into the top of the first chain-3 to close the round.
Step 4: Increasing for the Third Round Chain 3 again (counts as the first DC). For this round, crochet 1 double crochet in the first stitch, then 2 double crochets in the next stitch. Repeat this pattern around (1 DC in one stitch, 2 DC in the next stitch). After this round, you will have a total of 42 double crochets. Close the round with a slip stitch into the top of the first chain-3.
Step 5: Continuing with Further Rounds Continue increasing for the next rounds using the following patterns: For round 4: Crochet 1 DC in the first 2 stitches, then 2 DC in the next stitch. Repeat this pattern to complete the round with 56 stitches. For round 5: Crochet 1 DC in the first 3 stitches, then 2 DC in the next stitch. Repeat this pattern to complete the round with 70 stitches. For round 6: Crochet 1 DC in the first 4 stitches, then 2 DC in the next stitch. Repeat this pattern to complete the round with 84 stitches. For round 7: Crochet 1 DC in the first 5 stitches, then 2 DC in the next stitch. Repeat this pattern to complete the round with 98 stitches. Each round will increase by 14 stitches. Keep increasing until you reach the desired size.
Step 6: Switching Colors Once you’ve completed the desired number of rounds, it’s time to change colors. I’ll be switching to white yarn for the next few rounds. To change colors, simply fasten off the old color and join the new color at the end of the round. Make a slip stitch to join the new color, and continue crocheting.
Step 7: Working with White Yarn After attaching the white yarn, chain 3 (counts as the first DC). For round 8, crochet 1 DC in the first 5 stitches, then 2 DC in the next stitch. Continue this pattern around to complete the round with 112 stitches. After each round, join with a slip stitch into the top of the first chain-3 to close the round.
Step 8: Completing the Final Rounds For the next rounds, continue increasing by adding 1 more stitch between the increases: Round 9: Crochet 1 DC in the first 6 stitches, then 2 DC in the next stitch. Repeat this pattern for the entire round. Round 10: Crochet 1 DC in the first 7 stitches, then 2 DC in the next stitch. Continue until you reach your desired size or shape for the project.
Step 9: Working on the Edging Once the main body of your crochet piece is complete, you can begin the edging. Crochet a decorative border around your project using your preferred stitch pattern (e.g., scallops, shell stitches, or picots). Finish by weaving in any loose ends and cutting off excess yarn.
Step 10: Final Touches Block your crochet piece to help even out the stitches and shape the piece. Add any final decorative elements, such as buttons, beads, or additional stitches, to personalize the project.
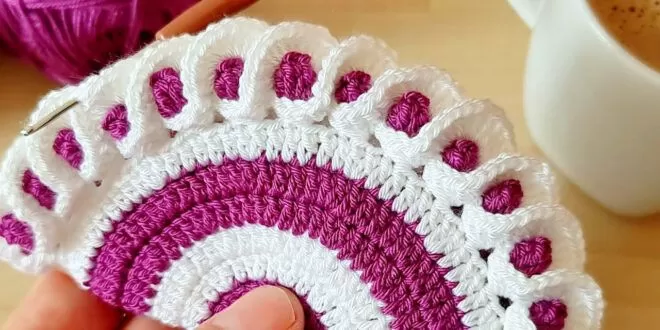
Video Tutorial:
I hope this tutorial was helpful! Don’t forget to subscribe and stay tuned for more fun crochet projects!

